元服务——路由基础
2024-11-12 16:54:41
13次阅读
0个评论
路由(router)
概述
路由(Routing)是指分组从源到目的地时,决定端到端路径的网络范围的进程。它是网络中数据包从源点到目的地的路径选择过程,可以确定数据包在多个网络互联的设备(如路由器)之间传输的最佳路径。
路由系统通常由一系列的路由规则组成,这些规则定义了 URL 路径(在 Web 应用中)或者某种导航标识符(在非 Web 应用中,如移动应用)与对应的组件或者页面之间的关联,在HarmonyOS开发中一般页面路由在src > main > resources > base > main_pages.json中设置。
路由的使用
我们将页面的信息都写到【src>main>resources>base>main_pages.json】中。
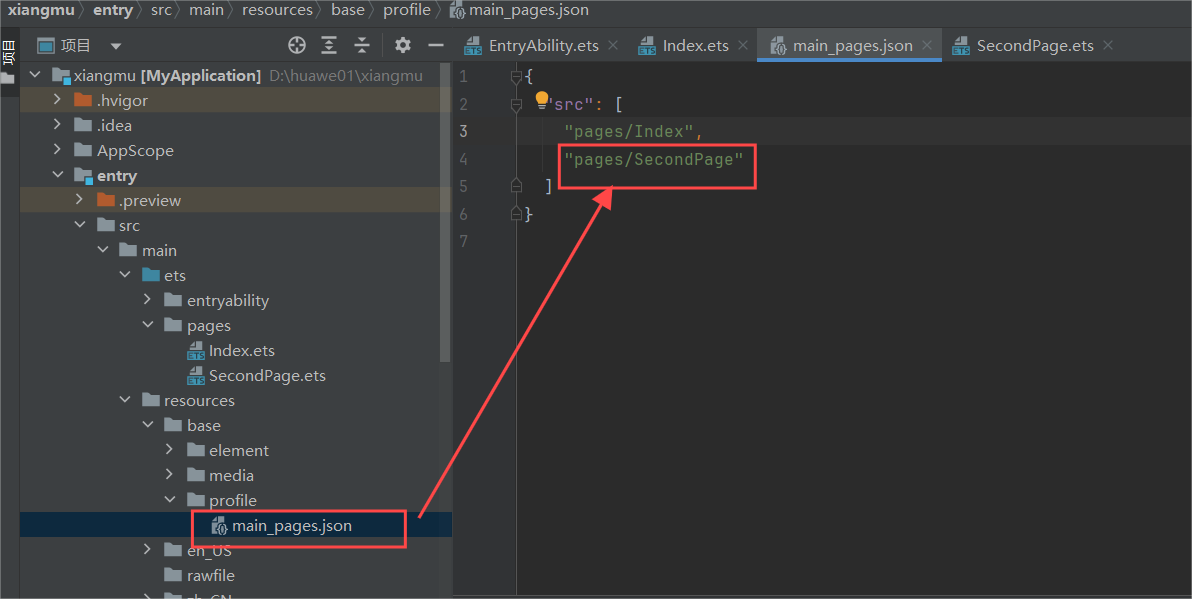
然后我们给页面一、二添加跳转代码 index.ets页面:
import { authentication } from '@kit.AccountKit';
import { BusinessError } from '@kit.BasicServicesKit';
import { hilog } from '@kit.PerformanceAnalysisKit';
import { router } from '@kit.ArkUI'


@Entry
@Component
struct Index {
  @State message: string = 'Hello World';

  build() {
    RelativeContainer() {
      Text(this.message)
        .id('HelloWorld')
        .fontSize(50)
        .fontWeight(FontWeight.Bold)
        .alignRules({
          center: { anchor: '__container__', align: VerticalAlign.Center },
          middle: { anchor: '__container__', align: HorizontalAlign.Center }
        })
      Button("跳转第二页").width('100%').height(80).onClick((event: ClickEvent) => {
        router.pushUrl({ url: 'pages/SecondPage' })
      }).margin({ top: 200 })
    }
    .height('100%')
    .width('100%')
  }

  aboutToAppear() {
    hilog.info(0x0000, 'testTag', '%{public}s', 'Ability onCreate');
    this.loginWithHuaweiID();
  }

  /**
   * Sample code for using HUAWEI ID to log in to atomic service.
   * According to the Atomic Service Review Guide, when a atomic service has an account system,
   * the option to log in with a HUAWEI ID must be provided.
   * The following presets the atomic service to use the HUAWEI ID silent login function.
   * To enable the atomic service to log in successfully using the HUAWEI ID, please refer
   * to the HarmonyOS HUAWEI ID Access Guide to configure the client ID and fingerprint certificate.
   */
  private loginWithHuaweiID() {
    // Create a login request and set parameters
    let loginRequest = new authentication.HuaweiIDProvider().createLoginWithHuaweiIDRequest();
    // Whether to forcibly launch the HUAWEI ID login page when the user is not logged in with the HUAWEI ID
    loginRequest.forceLogin = false;
    // Execute login request
    let controller = new authentication.AuthenticationController();
    controller.executeRequest(loginRequest).then((data) => {
      let loginWithHuaweiIDResponse = data as authentication.LoginWithHuaweiIDResponse;
      let authCode = loginWithHuaweiIDResponse.data?.authorizationCode;
      // Send authCode to the backend in exchange for unionID, session

    }).catch((error: BusinessError) => {
      hilog.error(0x0000, 'testTag', 'error: %{public}s', JSON.stringify(error));
      if (error.code == authentication.AuthenticationErrorCode.ACCOUNT_NOT_LOGGED_IN) {
        // HUAWEI ID is not logged in, it is recommended to jump to the login guide page

      }
    });
  }
}
SecondPage.ets页面:
import { router } from '@kit.ArkUI'

@Entry
@Component
struct SecondPage {
  @State message: string = '第二个页面';

  build() {
    RelativeContainer() {
      Text(this.message)
        .id('SecondPage')
        .fontSize(50)
        .fontWeight(FontWeight.Bold)
        .alignRules({
          center: { anchor: '__container__', align: VerticalAlign.Center },
          middle: { anchor: '__container__', align: HorizontalAlign.Center }
        })
      Button("跳转第一页").width('100%').height(80).onClick((event: ClickEvent) => {
        router.pushUrl({ url: 'pages/Index' })
      }).margin({ top: 200 })
    }
    .height('100%')
    .width('100%')
  }
}
完成之后,就可以在两个页面之间进行跳转了。
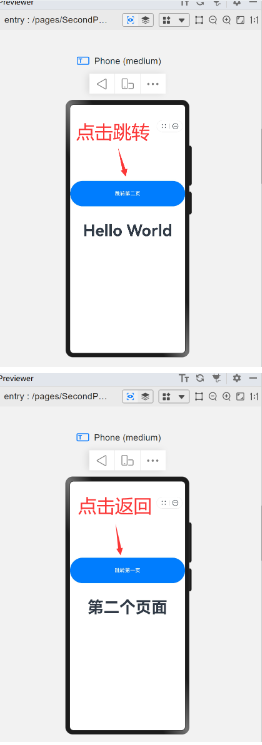
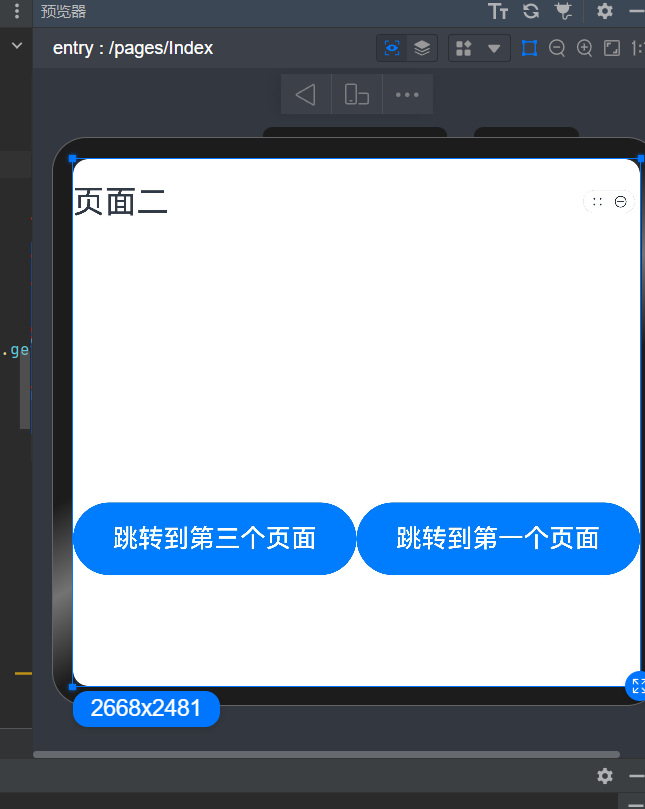
在此基础上,我们就可以写多个页面进行来回跳转


00
